こんにちは。システムデザイン開発の高木です。
これまで、T3 Stackに採用されている技術スタックについての記事を書いてきましたが、
今回は実際にT3 Stackを使用して、モダンなWeb開発を行う手法についてご紹介します。
本記事では、例として簡単なメモアプリを作成していきます。
T3 Stackとは
Theo氏によって提唱された、フロントエンド開発のためのフルスタックフレームワークです。
T3 Stackは、以下の思想に基づいて設計されています。
・simplicity(シンプルさ)
・modularity(モジュール性)
・full-stack type safety(フルスタックの型安全)
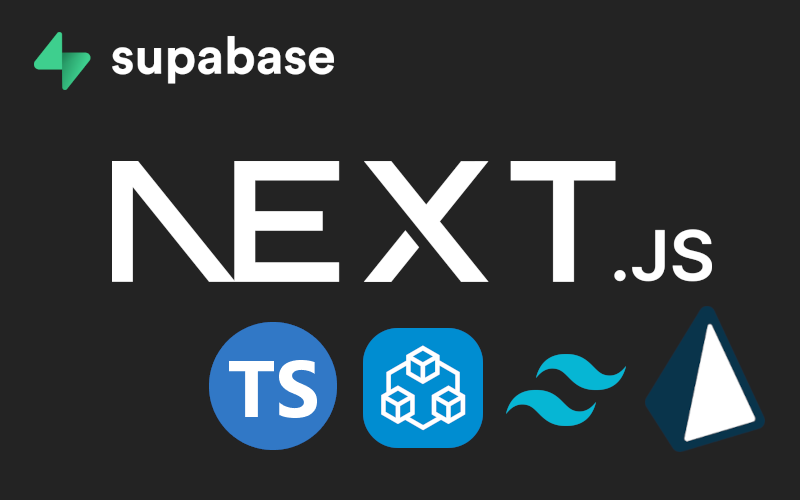
これらの思想を実現するために、T3 Stackでは以下の6つの技術スタックを採用しています。
・Next.js
https://nextjs.org/
・tRPC
https://trpc.io/
・Tailwind CSS
https://tailwindcss.com/
・TypeScript
https://www.typescriptlang.org/
・Prisma
https://www.prisma.io/
・NextAuth.js
https://next-auth.js.org/
シンプルな設計と、モジュール化された構造により、開発効率を上げることができます。
また、型安全が保証されるため、コードの品質も向上させることができます。
T3 Stackは、フロントエンド開発の効率と品質を向上させたい方に最適なフレームワークです。
プロジェクトの作成
create t3-appコマンドを使用して、プロジェクトを作成します。
npm create t3-app@latest質問に対しては以下のように返しています。
今回は認証機能を実装しないため、nextAuthのみ導入しません。
// プロジェクト名の設定
What will your project be called?:my-t3-app
// TypeScriptかJavaScriptどちらを使用するか
Will you be using TypeScript or JavaScript?:TypeScript
// 導入するパッケージを選択
Which packages would you like to enable?:prisma/tailwind/trpc
// 新しくGitリポジトリを作成するかどうか
Initialize a new git repository?:Y
// npm installを実行するかどうか
Would you like us to run 'npm install'?:Y
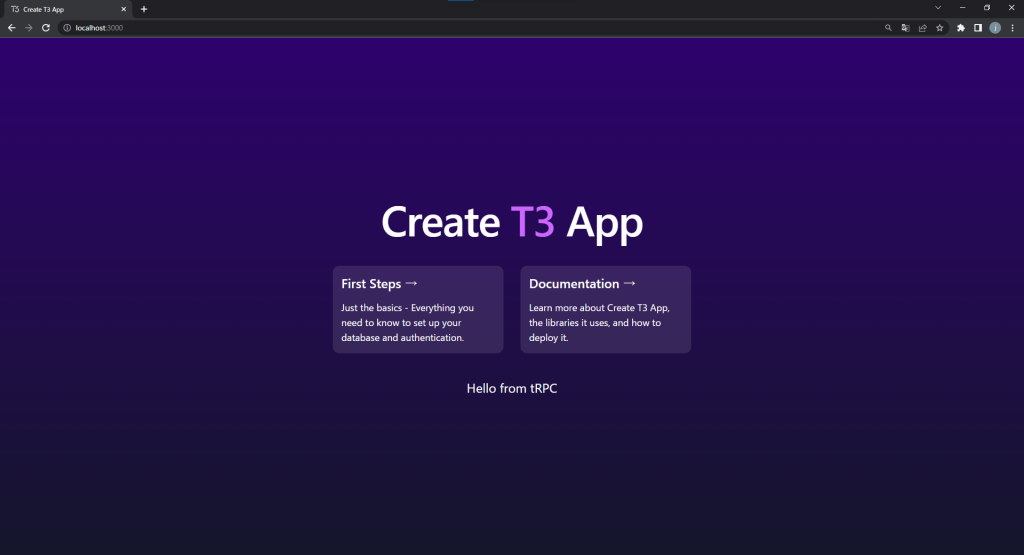
プロジェクト作成完了後、正常にデフォルトページが表示されるかどうかを確認してみましょう。
Databaseの作成
今回はSupabaseが提供しているDatabaseを使用します。
Supabaseとは、「Firebase Alternative」と謳われているBaaSの1種です。
Databaseや認証機能の提供、ストレージの管理、プッシュ通知のサポート等、
できることはFirebaseと殆ど同じなのですが、Databaseの点において決定的な違いがあります。
それは、PostgreSQL ベースのRDBMSを扱えるということです。
Firebaseが提供している「Cloud Firestore」は、NoSQL型のDatabaseであるため、
初心者には敷居が高く、使用する場面も限定されてしまうというデメリットがありました。
それに対してSupabaseでは、多くの方に馴染みのあるRDBMS(PostgreSQL)を提供しているため、学習コストがかからず、様々な場面で使用することができます。
余談ですが、Vercelからも2023年5月2日にVercel Storageが発表されましたね。
RedisベースのVercel KVや、PostgreSQL ベースのVercel Postgresが利用できるようなので、
そちらもまた別の記事でご紹介できたらなと思います。
Supabaseのプロジェクト作成手順については、こちらを参照してください。
Project Settings/Database Settings内にConnection stringという項目があるかと思うので、
この接続文字列を.envのDATABASE_URLに設定しておきます。
※[YOUR-PASSWORD]はご自身で設定したパスワードに変更してください

.env
DATABASE_URL="postgresql://postgres:XXXXX@db.wcxmykzvvljbynaktjjf.supabase.co:5432/postgres"Schemaの作成
Schemaの作成には、PrismaのMigrate機能を使用します。
prisma/schema.prisma
generator client {
    provider = "prisma-client-js"
    previewFeatures = ["jsonProtocol"]
}

datasource db {
   provider = "postgresql"
    url      = env("DATABASE_URL")
}

model Notes {
    id        Int      @id @default(autoincrement())
    content   String
    createdAt DateTime @default(now()) @map(name: "created_at")

    @@map("notes")
}今回はPostgreSQLを使用するため、db.providerにpostgresqlを指定しています。
デフォルトではsqliteが指定されているため、使用するDatabaseに合わせて変更しましょう。
Prisma Migrateは、schema.prismaに定義されているデータモデルを元に実行されるため、model Notesの定義を追加しています。
「notes」というTableに、以下のColumnを持つように定義しています。
・id:primary key
・content:内容
・created_at:作成日
デフォルトでは、Model名 = Table名、Field名 = Column名にマッピングされてしまうのですが、
Databaseに関する命名はSnakeCase形式にしたいため、mapアノテーションを使用しています。@mapは、明示的にColumn名を指定することができます。(createdAt → created_at)@@mapは、明示的にTable名を指定することができます。(Notes → notes)
migrateを実行します。
npx prisma migrate dev --name initmigrate の結果については、SupabaseのTable Editorから確認してみましょう。
エンドポイントの作成
エンドポイントの作成には、tRPCのRouterを使用します。
server/api/routers/note.ts
import { z } from "zod";
import { createTRPCRouter, publicProcedure } from "~/server/api/trpc";

export const noteRouter = createTRPCRouter({
  fetch: publicProcedure.query(async ({ ctx }) => {
    const notes = await ctx.prisma.notes.findMany({
      orderBy: {
        createdAt: "desc",
      },
    });
    return notes;
  }),
  create: publicProcedure
    .input(z.object({ content: z.string() }))
    .mutation(async ({ ctx, input }) => {
      await ctx.prisma.notes.create({
        data: { content: input.content },
      });
    }),
  delete: publicProcedure
    .input(z.object({ id: z.number() }))
    .mutation(async ({ ctx, input }) => {
      await ctx.prisma.notes.delete({
        where: { id: input.id },
      });
    }),
});
今回は以下の処理を実装しています。
・fetch:メモ一覧の取得
・create:新規メモの作成
・delete:メモの削除fetchはデータ取得を行うProcedureであるため、query()を使用しており、create/deleteはデータ更新を行うProcedureであるため、mutation()を使用しています。prisma(PrismaClient)を参照しているctxですが、これはtRPCのRequest Contextになります。
Contextとは、全てのProcedureからアクセス可能なデータのことです。
T3 Appでは、デフォルトでPrismaClientをContextに設定してくれています。
作成したnoteRouterをappRouterにマージします。
server/api/root.ts
import { noteRouter } from "~/server/api/routers/note";
import { createTRPCRouter } from "~/server/api/trpc";

export const appRouter = createTRPCRouter({
  note: noteRouter,
});

export type AppRouter = typeof appRouter;appRouterに直接エンドポイントの定義をすることもできますが、煩雑になってしまうため、
今回のようにresource毎にRouterを作成し、appRouterにマージしていく方法がおすすめです。appRouterの型をexportすることで、フロント側からProcedureを実行できるようになります。
画面の作成
import { type NextPage } from "next";
import { useState, ChangeEvent } from "react";
import { api } from "~/utils/api";

const Home: NextPage = () => {
  const [content, setContent] = useState("");
  const { isLoading, error, data, refetch } = api.note.fetch.useQuery();
  const createMutation = api.note.create.useMutation();
  const deleteMutation = api.note.delete.useMutation();

  if (error) {
    return <>Error</>;
  }

  const handleContentChange = (e: ChangeEvent<HTMLInputElement>) => {
    setContent(e.target.value);
  };

  const handleSaveClick = () => {
    createMutation.mutate({ content: content }, { onSuccess: () => refetch() });
    setContent("");
  };

  const handleDeleteClick = (id: number) => {
    deleteMutation.mutate({ id: id }, { onSuccess: () => refetch() });
  };

  return (
    <div>
      <nav className="bg-gray-800">
        <div className="mx-auto px-4">
          <div className="flex h-16 items-center">
            <div className="flex items-center">
              <div className="flex-shrink-0">
                <img
                  className="h-8 w-8"
                  src="https://tailwindui.com/img/logos/mark.svg?color=indigo&shade=500"
                />
              </div>
            </div>
            <div className="flex items-center">
              <div className="ml-5 flex-shrink-0">
                <span className="font-medium text-[hsl(280,100%,70%)]">
                  T3 App
                </span>
              </div>
            </div>
          </div>
        </div>
      </nav>
      <main>
        <div className="px-5 pt-5">
          <div className="grid grid-cols-3">
            <div className="col-span-2">
              <input
                id="content"
                type="text"
                placeholder="Content"
                className="w-full rounded-lg border border-gray-300 px-4 py-2 focus:outline-none focus:ring-2 focus:ring-blue-300"
                value={content}
                onChange={handleContentChange}
                autoComplete="off"
              />
            </div>
            <div className="col-span-1 pl-3">
              <button
                type="button"
                className="rounded-lg border border-blue-500 bg-blue-500 px-4 py-2 text-white transition duration-500 hover:bg-blue-600 focus:outline-none"
                onClick={handleSaveClick}
              >
                Save
              </button>
            </div>
          </div>
          <div className="pt-5">
            <table className="min-w-full leading-normal">
              <thead>
                <tr>
                  <th className="w-40 border-b-2 border-gray-200 bg-gray-100 px-5 py-3 text-left text-xs font-semibold text-gray-600">
                    CreatedAt
                  </th>
                  <th className="w-40 border-b-2 border-gray-200 bg-gray-100 px-5 py-3 text-left text-xs font-semibold text-gray-600">
                    Content
                  </th>
                  <th className="border-b-2 bg-gray-100" />
                </tr>
              </thead>
              <tbody>
                {!isLoading ? (
                  data!.map((note) => (
                    <tr key={note.id}>
                      <td className="border-b border-gray-200 bg-white px-5 py-3 text-sm">
                        <div>
                          <p className="whitespace-no-wrap text-gray-900">
                            {note.createdAt.toLocaleDateString()}
                          </p>
                        </div>
                      </td>
                      <td className="border-b border-gray-200 bg-white px-5 py-3 text-sm">
                        <div>
                          <p className="whitespace-no-wrap text-gray-900">
                            {note.content}
                          </p>
                        </div>
                      </td>
                      <td className="border-b border-gray-200 px-5 py-3 text-right">
                        <button
                          type="button"
                          className="rounded-lg border border-red-500 bg-red-500 px-4 py-2 text-white transition duration-500 hover:bg-red-600 focus:outline-none"
                          onClick={() => handleDeleteClick(note.id)}
                        >
                          Delete
                        </button>
                      </td>
                    </tr>
                  ))
                ) : (
                  <tr />
                )}
              </tbody>
            </table>
          </div>
        </div>
      </main>
    </div>
  );
};

export default Home;
本来はComponent化をする事が望ましいですが、今回は省略しています。
スタイリングにはTailwind CSSを使用しています。
const { isLoading, error, data, refetch } = api.note.fetch.useQuery();useQuery()を使用してfetchを実行し、結果を分割代入しています。
・isLoading:データの取得状態を表すフラグ (取得中:true、取得完了:false)
・error:データ取得中にエラーが発生した場合、エラーオブジェクトが代入される
・data:データ取得完了後、取得したデータが代入される
・refetch:データを再取得するためのメソッドuseQuery()はマウント時に実行されるため、useEffect()は不要です。
const createMutation = api.note.create.useMutation();tRPCエンドポイント(create)に対して、データを送信するためのメソッドを生成しています。
const deleteMutation = api.note.delete.useMutation();tRPCエンドポイント(delete)に対して、データを送信するためのメソッドを生成しています。
 const handleSaveClick = () => {
    createMutation.mutate({ content: content }, { onSuccess: () => refetch() });
    setContent("");
};Saveボタンクリック時、contentを送信して登録処理を実行しています。onSuccess()は処理が正常終了した際に実行されるコールバック関数です。refetch()を実行し、最新のデータを取得しています。
const handleDeleteClick = (id: number) => {
    deleteMutation.mutate({ id: id }, { onSuccess: () => refetch() });
};Deleteボタンクリック時、idを送信して削除処理を実行しています。onSuccess()は処理が正常終了した際に実行されるコールバック関数です。refetch()を実行し、最新のデータを取得しています。
 <tbody>
   {!isLoading ? (
     data!.map((note) => (
       <tr key={note.id}>
         <td className="border-b border-gray-200 bg-white px-5 py-3 text-sm">
           <div>
             <p className="whitespace-no-wrap text-gray-900">
               {note.createdAt.toLocaleDateString()}
             </p>
           </div>
         </td>
         <td className="border-b border-gray-200 bg-white px-5 py-3 text-sm">
           <div>
             <p className="whitespace-no-wrap text-gray-900">
               {note.content}
             </p>
           </div>
         </td>
         <td className="border-b border-gray-200 px-5 py-3 text-right">
           <button
             type="button"
             className="rounded-lg border border-red-500 bg-red-500 px-4 py-2 text-white transition duration-500 hover:bg-red-600 focus:outline-none"
             onClick={() => handleDeleteClick(note.id)}
           >
             Delete
           </button>
         </td>
       </tr>
     ))
   ) : (
     <tr />
   )}
</tbody>取得したデータを描画している部分です。isLoadingがfalseの場合(データ取得完了時)、取得したデータを展開しています。isLoadingがtrueの場合(データ取得中)、空のtrを返しています。
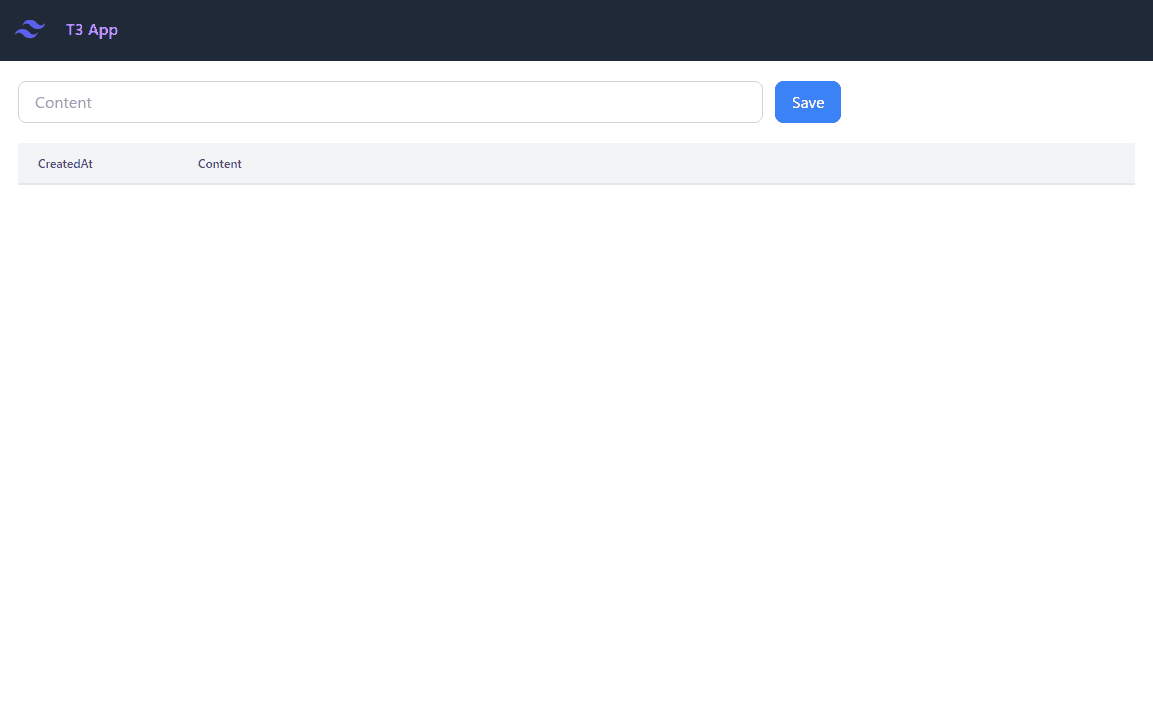
動作イメージは以下の通りです。
まとめ
今回は実際にT3 Stackを使用してみましたが、導入~実装までとても手軽に行えたと思います。
前回・前々回の記事でご紹介した内容では、導入や初期設定がわりと面倒でしたが、
T3 Appを使用することで、ある程度の雛形が既に用意された状態で開発を進めることができるため、是非皆さんもT3 Appを活用してみてください。
システムデザイン開発は、北海道の地で35年以上の歴史があります。企業向けのシステム設計~開発・構築~保守運用までワンストップサービスを提供するシステム開発会社です。豊富な開発実績と高い技術力を強みとして、北海道から全国へ幅広い分野・業種へトータルにサポートいたします。
システムの導入やご検討、お困りごとがありましたら、お気軽にご相談・お問合せください